Getting the best from your trail camera starts with you. The best tools can’t be used to their full potential if they aren’t put in the situations to succeed. The world’s best screwdriver can’t be a good hammer. Knowing your tools, or in this case your cameras, helps you put them in the best position to get you the most information, with the least frustration, and keep you ready for this coming fall.
Here are the top six things to keep in mind to get the best photos and performance from your cameras.
1. Choose the Right Camera for the Job
Getting the right camera for the place you are going to hang it will go a long way to making sure you are happy with your camera’s performance. If you’re hanging it on a trail where deer are going to be moving, you will want to prioritize detection range and trigger speed to ensure you capture photos that actually have deer in them, and not after they’ve walked past. Similarly, if you’re putting the camera on a food plot, feeder, or mineral site where the deer will be coming in and milling around for a bit, you can go with something with a slower trigger speed. Just make sure whatever area you are focused on getting pictures in is within the flash and detection range of the camera once it is in place.
Sure, any camera in almost any place can get you some pictures. But if you want to maximize the volume and quality of the photos you are getting from your trail camera, start with a camera that has the features that work the best for how it will be used.
2. Use Solar Cameras Where It Makes Sense
There are some places we put cameras that are easy to get to. Maybe it's right on a main trail, or a food plot, or near a feeder that we will refill anyway. Servicing these cameras when needed is easy because we can go right by them without disturbing a property too much. Then there are those deep, dark haunts where the big bucks live that we want to stay out of entirely. Getting a trail camera in or near there can be difficult. We don’t want to go in to mess with batteries. We don’t want to go in for anything. This is where a solar camera can really change how you scout. By soaking up the sun’s rays and powering the camera off them, you can keep some solar trail cameras going for months. If the camera is also cellular, you can even get your photos without going in there as well. FLEX-series cameras will even do firmware updates without visiting the camera. That can make all the difference when it comes to keeping a deer feeling secure for the coming season.

3. Ditch the Stick
If we sold it, the dreaded trail cam stick would probably be our #1 accessory. We see it all the time. Customers hang the camera shoulder high, then cram a stick behind a camera to get it pointed down. This is costing you photos. By angling the camera down, you are shooting the camera’s detection cone into the ground as well. You may have a detection range of 100 feet but angling the camera down cuts that number way down, maybe to even less than half of the camera’s ability. That means anything moving in front of the camera from further away, the camera can’t see or get a photo of. Not only that, but you’re also directing your flash down. This leads to hot spots or washed-out areas of intense flash. So, the photos you get are of lower quality. Next time you mount a camera, pretend it’s freshman football practice, and take a knee. Mount the camera about waist high and forget the stick. You’ll have a better angle on the photos and be more likely to realize the entire flash and detection range.
4. Clear the Area
Few things are more aggravating than photos of nothing. Trail cameras rarely take photos for no reason, you just may not like the reason the camera has chosen. Cameras are triggered to take photos because of movement. The more things within the detection range of the camera that can trigger movement that aren’t deer, the more likely you are to have photos of things that aren’t deer. I love running cameras on trees along field edges from mid-October through Thanksgiving to see what bucks are hitting scrapes. That time of the year is also known for its weather changes and storms, and that means wind, and that means moving branches. For every good picture I get of a nice buck on a scrape, I get dozens of that branch moving. There’s nothing I can do about it, that’s where I chose to put the camera, and why it's important to choose the right transmission plan. There are lots of other situations where you can do something about it though. The most important accessory you can have when hanging trail cameras is a good machete. Unnecessary branches or grass in front of the camera that are just going to catch wind and make the camera take photos need to go. Take the extra few minutes to clean up the area around the camera and save yourself a bunch of empty photos that are your fault, not the camera’s.
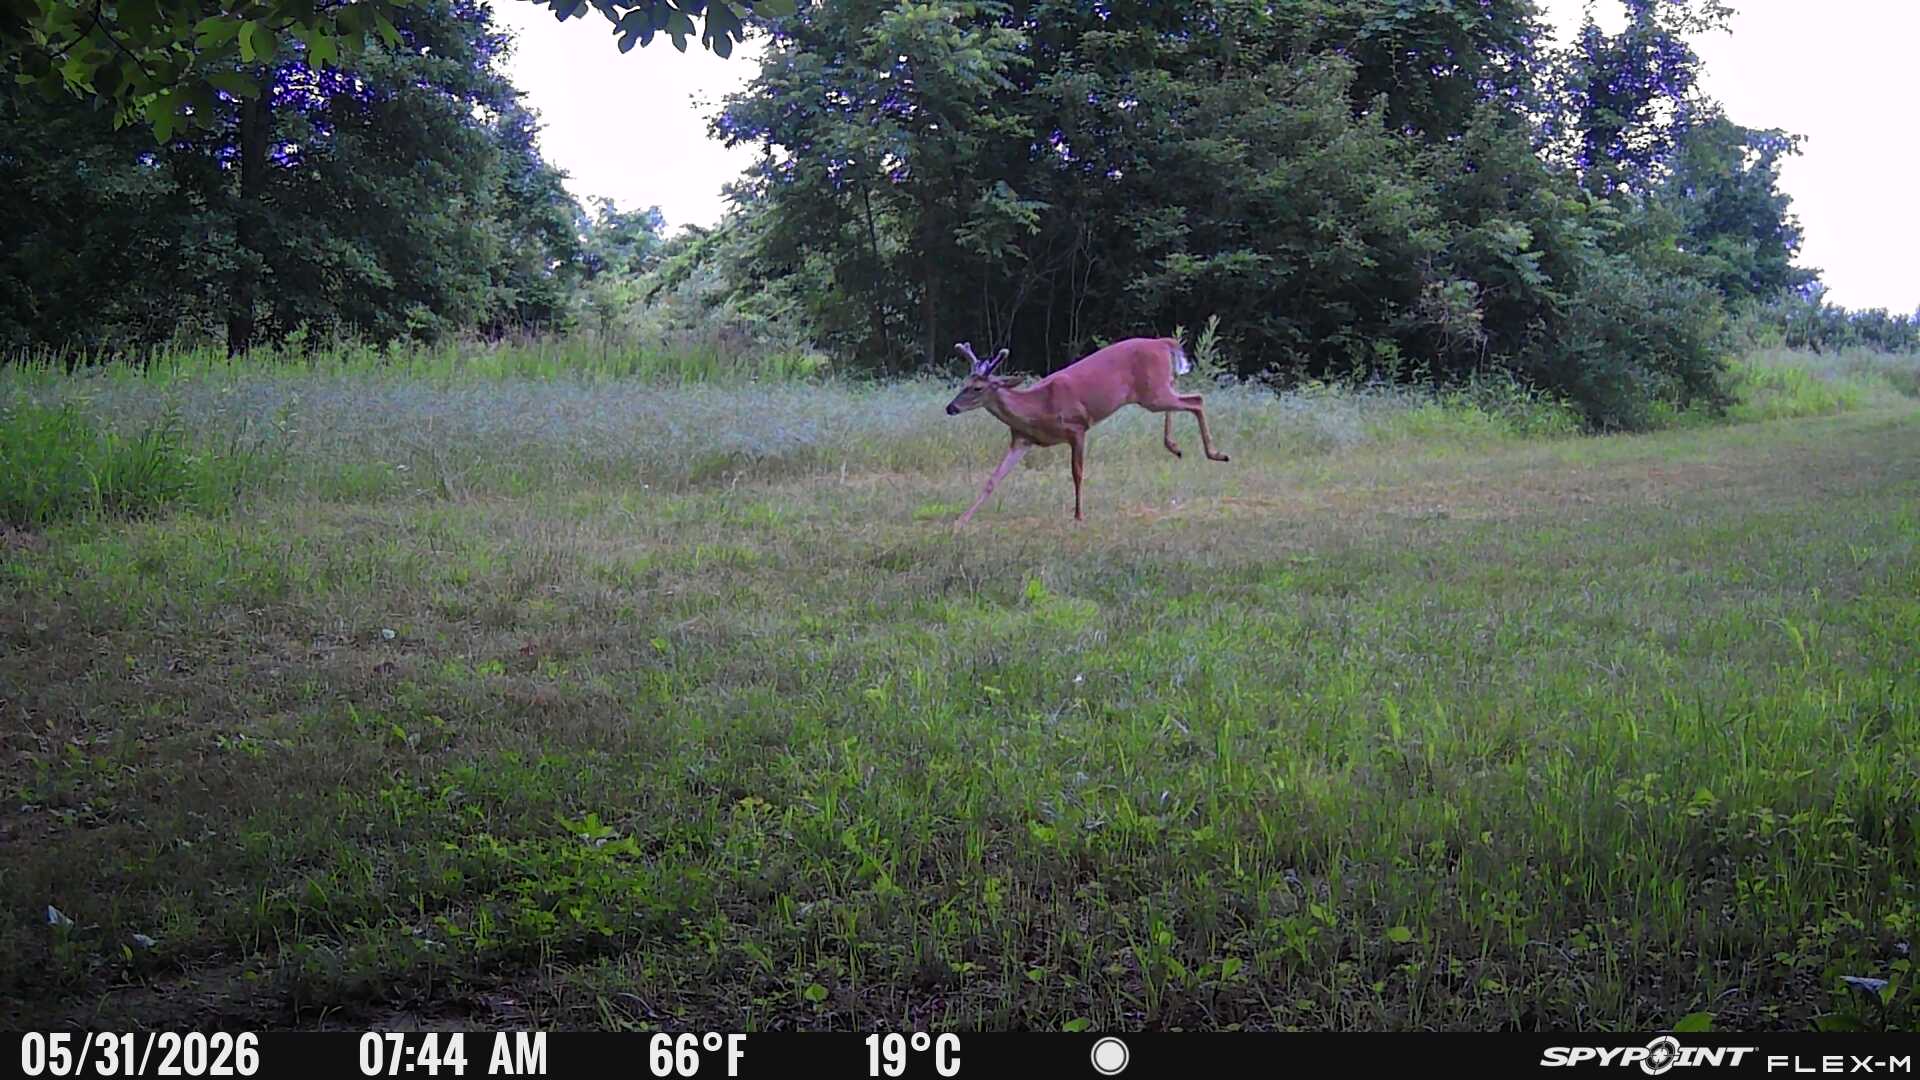
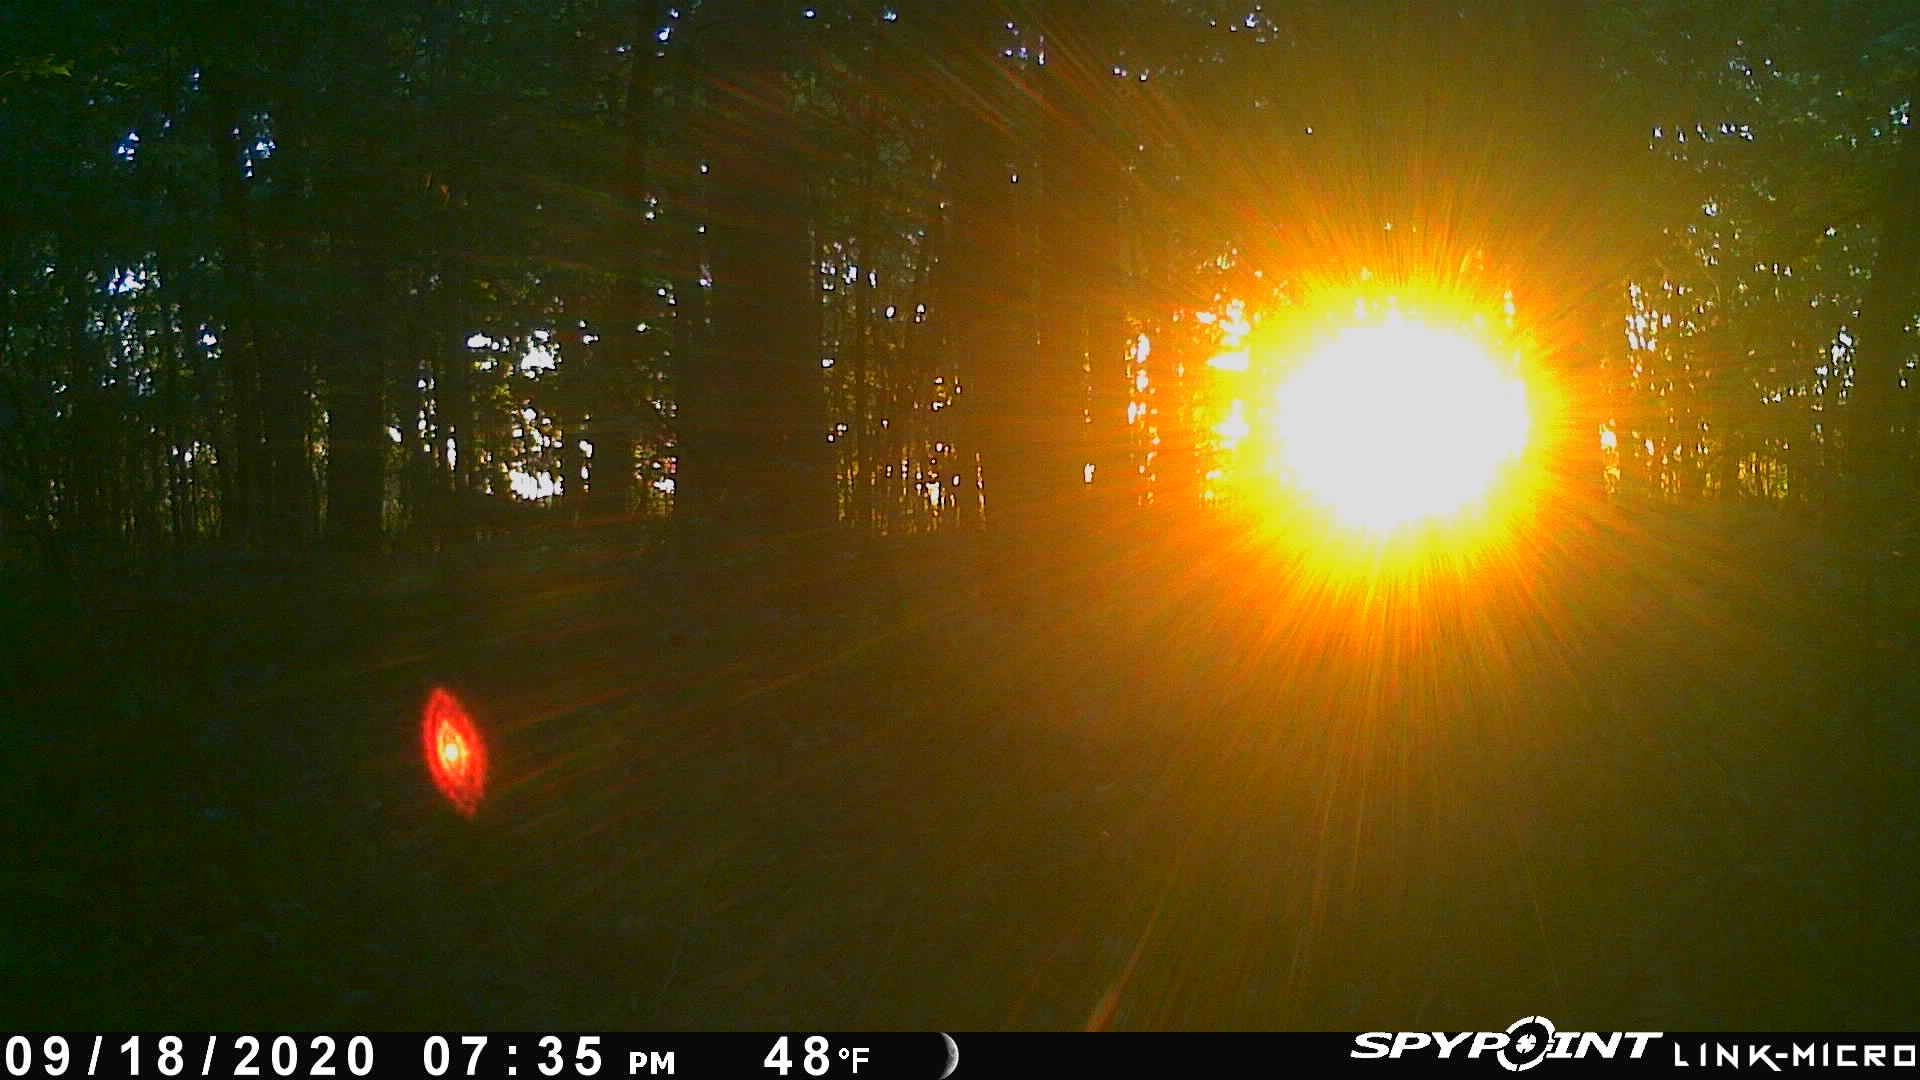
5. Avoid East/West Exposure
When motion activates the camera to take a photo, it has just a fraction of a second to take that photo. This is the trigger speed. In the case of the FLEX-series, this is as fast as 0.3 seconds. In that time, the camera has to measure and account for ambient light conditions to determine the exposure and shutter time to capture a photo. In good, even light conditions, there may be a lot of margin for error to get a good picture. What can wreck the camera’s ability to take a good photo? Staring into a rising or setting sun. If we were in this situation, we might squint or raise a hand to block out the sun. However, a camera only has a few options to compensate for a burning sun shining right into the lens; less exposure time or a smaller aperture. In either case, the sun is going to appear huge and bright, and the rest of the area is going to be very dark. This sun flare renders the photo virtually useless. That’s not the camera’s fault, that’s optical and photography physics. Whenever you have the option, point your camera more north or south to avoid the chances of the sun shining directly into the lens of the camera. This will reduce the likelihood of flared photos and improve lighting conditions across the board.
A huge part of how well a trail camera performs is up to the hunter that installs it. Keep these things in mind and, more often than not, you should be happy with how your camera performs. Obviously, not every situation allows us to take every precaution we would like to take, but if we are aware of the hazards, we can manage the expectations of those cameras in those locations and understand what we are likely to get.
Good luck out there!