The biggest benefit to using a cellular trail camera is that the pictures come to you instead of you having to go into the field and retrieve the images yourself. To do this, cellular trail cameras use cell phone signals to transmit the images to your account on the SPYPOINT app. Luckily, SPYPOINT cellular cameras are equipped with all-carrier Dual-SIM technology that automatically connects to the strongest signal in the area. However, like cell phones, signal reception can sometimes vary by location. The better the cellular signal strength, the better the results from your camera.
Thankfully, there are a number of things you can do to help improve your cellular trail camera’s signal to ensure that you get the best photo transmission possible. Here are some of the best tips!
Turn It Off and On
Sometimes the simplest solution is the best solution. In some cases, all it takes for your camera to pick up a better cellular signal is to reboot it. Simply turn the trail camera off, wait a few seconds, and then turn it back on again. Give it a couple of minutes and see if it connects and communicates. It’s highly likely that the simple flick of a switch is all it takes for a stronger signal.
Consider Your Camera Placement
If your trail camera is located near the edge of a field with a clear or minimally obstructed view of the sky, you’re going to have a better chance of getting a stronger signal with better photo transmission. Placing the camera in a heavily wooded area or at the bottom of a valley is likely going to result in a weak signal. This isn’t an issue with the camera’s capabilities; it’s a limitation of cellular networks in general.
Large metal or concrete structures can also wreak havoc with cellular signals. People often mount their cameras near or even on the blinds that they’re going to hunt out of. All sorts of things can be used as a makeshift blind these days - including structures with metal or concrete - and they can interfere with the camera’s ability to connect with a cell tower.
Instead of mounting the camera on or near a metal or concrete structure, consider moving it to a slightly different spot where you can get the same desired photo angle but with the camera not as close to the obstructing structure.
Check Your Signal Strength
Your cellular trail cameras use the nearest cell tower to transmit images, and there’s a good possibility that the nearest tower isn’t as close to the camera where you plan on hunting as it would be at your house or in your neighborhood.
After you find a spot where you want to mount your camera, you can check the signal strength while you’re out in the field to make sure that you’re getting the strongest signal in the particular area where you want to place the camera. In the app, pick the correct camera and take a look at how many bars of cell service the camera is picking up. If the bars indicate 25% or less reception, then you might want to move the camera to a nearby area and see if the cell reception improves.
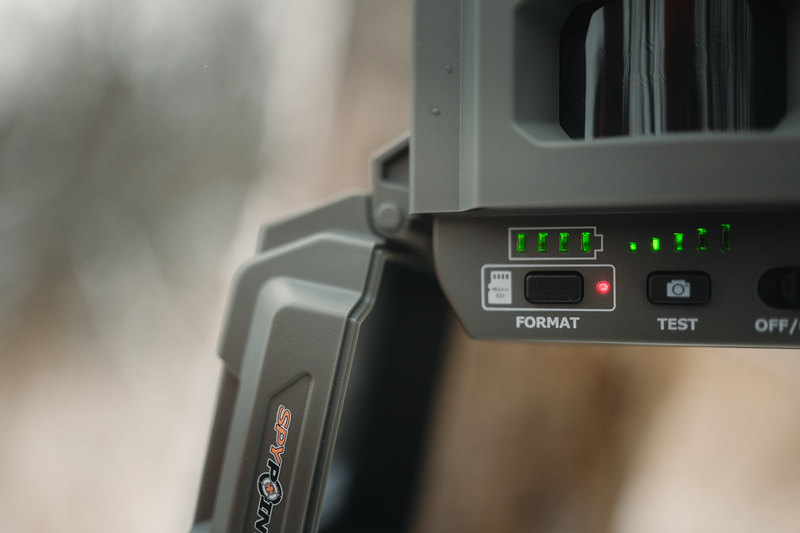 The lights above the TEST button also indicate your camera's signal level.
Check Your Antenna
The antenna on your SPYPOINT trail camera is removable; it threads onto the unit. Sometimes when moving the cameras around, the antenna can get jostled and it can start to unthread from the unit. An antenna that isn’t fully attached to the camera is going to cause poor cell reception, so just make sure that it is completely threaded in tightly to the body of your camera. In addition to being removable, your antenna is also moveable. If the antenna is tight on the camera, try changing the angle of the antenna in a different direction. Sometimes all it takes to get a better signal is to make sure the antenna is threaded in fully and positioned in a different direction.
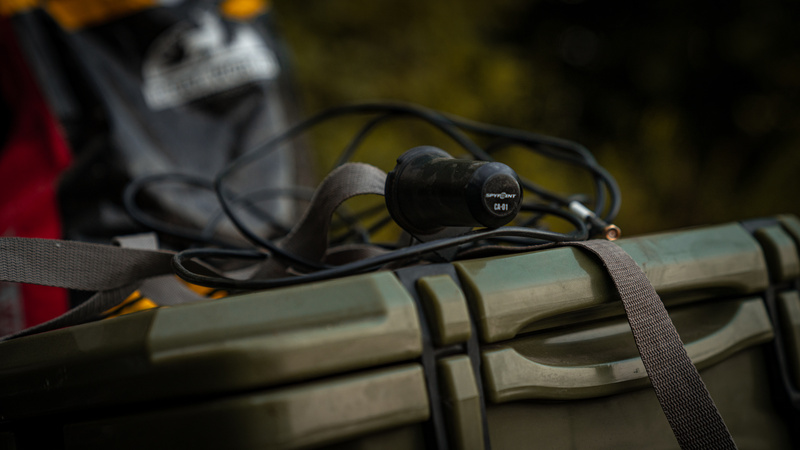
If, however, your antenna is still giving you trouble, you can upgrade to the SPYPOINT CA-01 long-range cellular antenna to help boost your signal. This external, passive, omnidirectional antenna can boost the cellular signal in low-coverage areas. The 15-foot cable and attached mounting bracket make installation a snap and ensure you can get into just the right position for optimum performance. Best of all, no external power source is required, so you can just plug it in and go.
Check the Lights
Most of the time, your camera will tell you what’s wrong if you look at the lights on the unit. Different colors and/or patterns mean different things. Take a look at the label on the inside of the camera or the camera manual (which can be found by choosing your model here) and check it against the lights that you are or are not seeing on your camera. If you’re getting a noted error, follow the instructions to fix the specific problem that the camera is having.