Checking in on your trail cameras and seeing what photos you’ve captured is always exciting. You never know when your target buck is going to cruise by or when you’ll see a new flock of turkeys show up where you didn’t expect to see them. However, that excitement can quickly turn to disappointment if you check in and find that your camera captured a bunch of false triggers.
These false alarms on your trail cameras can be frustrating. Not only are you missing out on seeing the wildlife, unless you have an unlimited monthly transmission plan—you’re also burning through your monthly limit of transmitted photos. (Pro tip: joining the Insiders Club automatically bumps you up from 100 to 250 free photos per camera per month.)
If you want to reduce the number of false triggers that your trail cameras are getting, we’ve got five easy ways to reduce that problem. Following these tips will help eliminate photos of squirrels and armadillos as well as videos of trees blowing in the wind.
1. Mount the Trail Camera at the Proper Height and Angle
Mounting your trail cameras at the proper height and angle is crucial to avoiding blank photos on your trail cameras. If the trail camera is mounted too low, then it will hone in on small animals that are passing by instead of the bigger targets that you’re looking to capture. Similarly, mounting the camera higher up but angled down can also create the same problem.
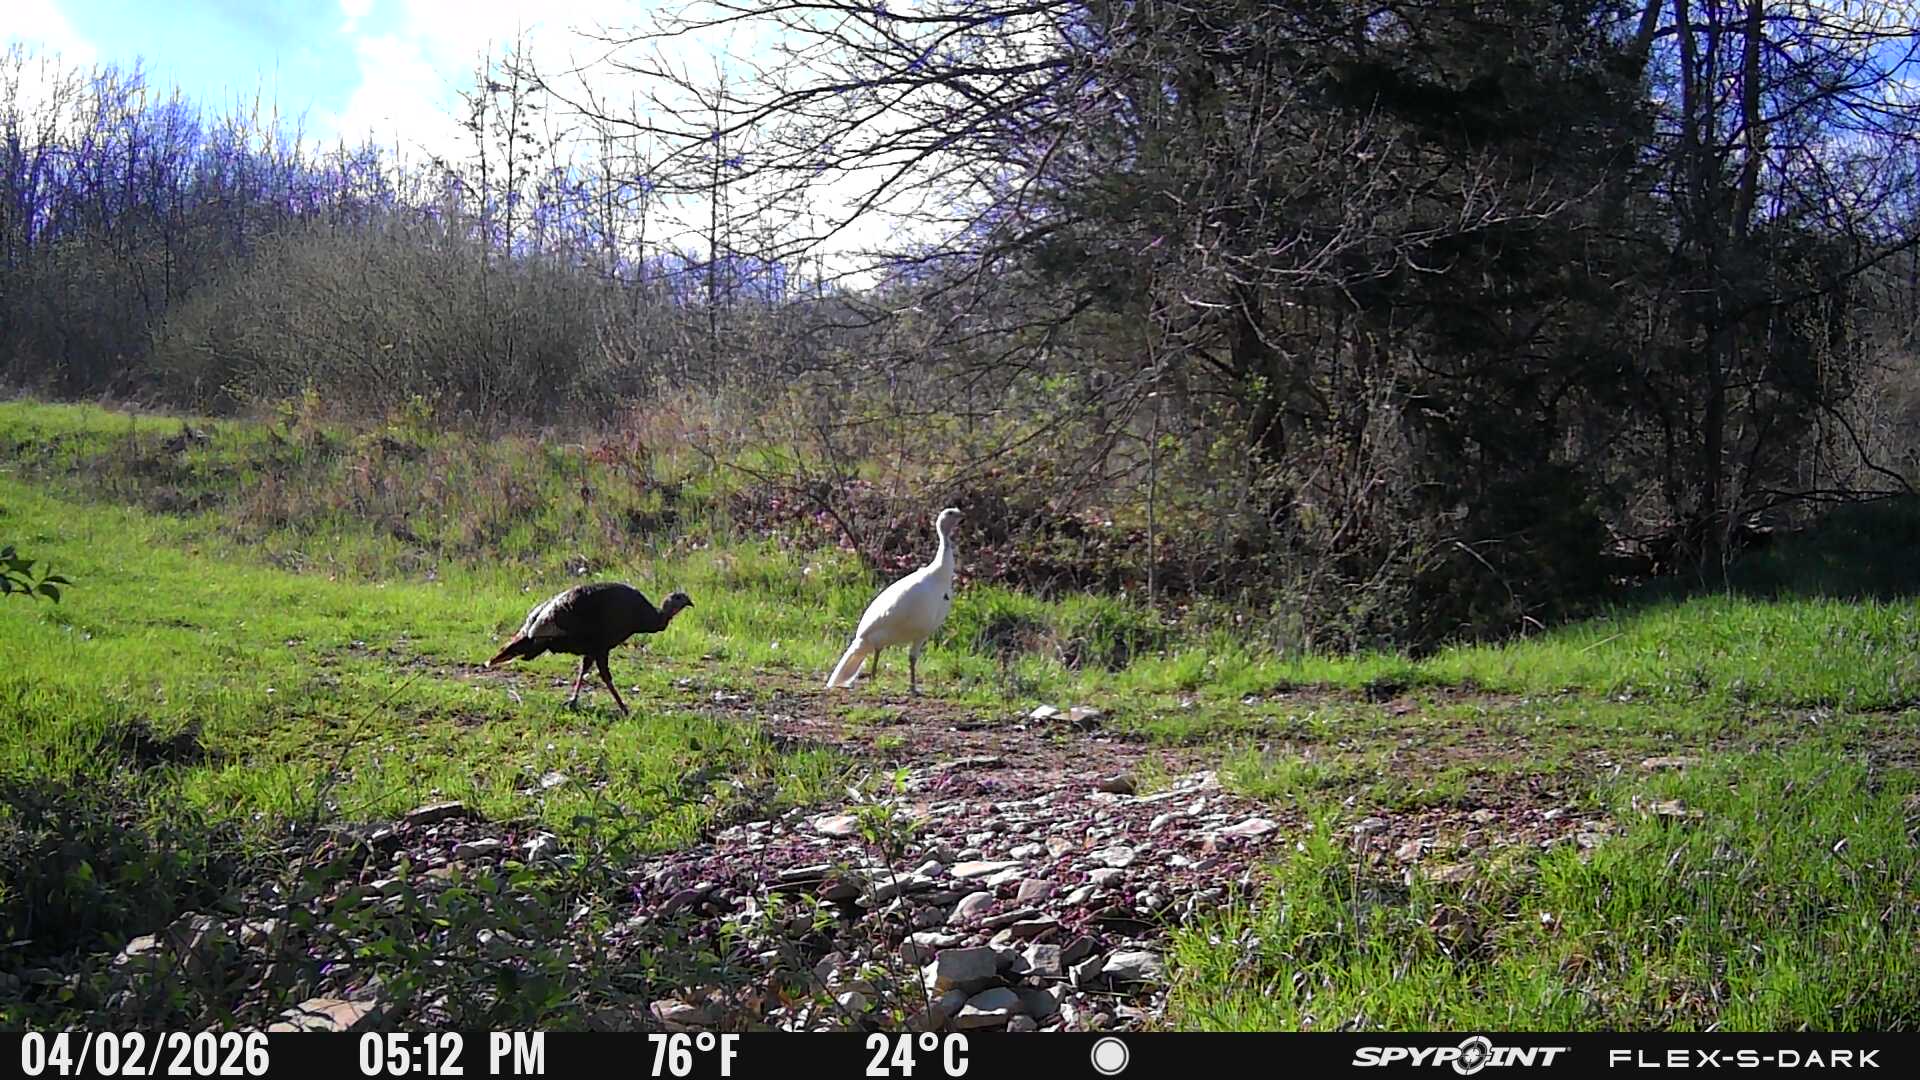
A good rule of thumb is to mount your camera at waist height. This will put the focal point around eye level with deer while still being low enough to catch turkey and other similarly sized animals. It’s also just high enough to avoid being triggered by small animals like skunks, squirrels, possums, and armadillos.
2. Remove Surrounding Debris and Vegetation
Wind plays a key factor in hunting, and it’s also crucial to getting good trail camera photos and videos. When placing your camera, make sure that you clear the area around it of any debris and vegetation that can be blown around by the wind. That movement will trigger the camera’s sensors and tell it to take photos or videos.
Once you have your camera mounted where you want it, take the time to clip branches and leaves that are near the camera and not just ones that are in the direct line of sight. On windy days, branches and leaves that might be out of frame in still weather could be blown into view and trigger the camera’s motion detection.
Don’t ignore ground vegetation. If there are plants on the ground that are large enough to be blown by the wind, then you’ll want to clear them, too, or they could also create false triggers.
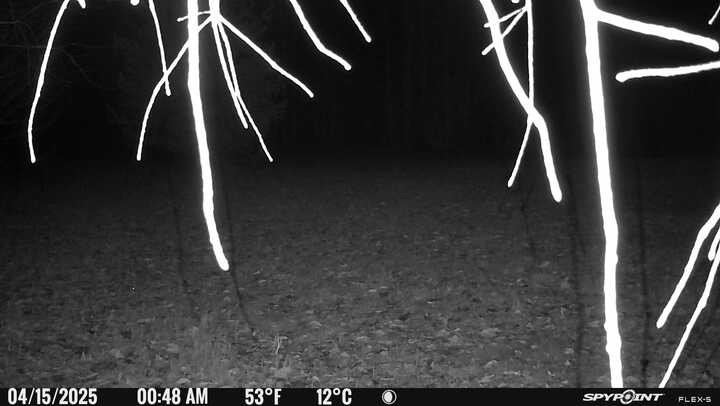 Low-hanging branches that blow into a trail camera’s field of view can cause false triggers.
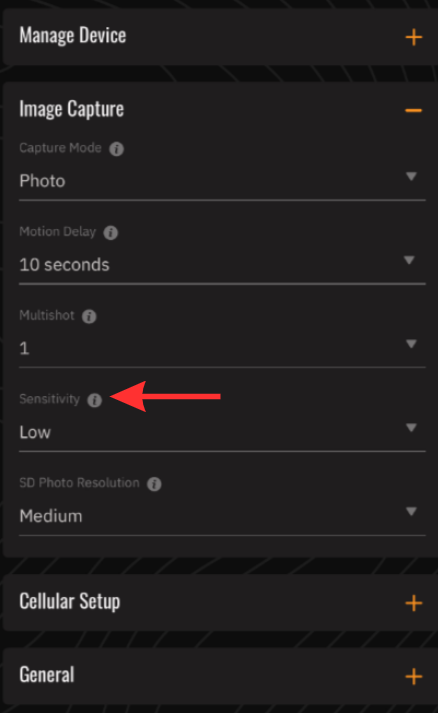
3. Adjust the Trail Camera’s Sensitivity Level
Each SPYPOINT camera has three sensitivity levels from which you can choose: low, medium, and high. If you’re getting a bunch of false triggers, make sure you look at the sensitivity level that you’ve set. If it’s high, bump it down to medium; if medium, go down to low. If you’re set on low and still having issues, then there may be other factors at play, such as placement or vegetation.
4. Orient the Trail Camera Away from the Sun
The sun rises in the east and sets in the west, making those directions bad for trail cameras. They can result in images that are either washed out with sun flares or too dark to make out any detail. Similarly, the angle at which sunlight hits different objects can also create false triggers.
If your camera is positioned in such a way that it ends up tracking the sun’s movement, the change in sunlight angle as it hits different objects on the ground can be an issue. You should also take bodies of water into consideration. If there’s a pond in the frame of your camera, the movement of sun glare off of the water could also result in a photo or video that isn’t of any use to you.
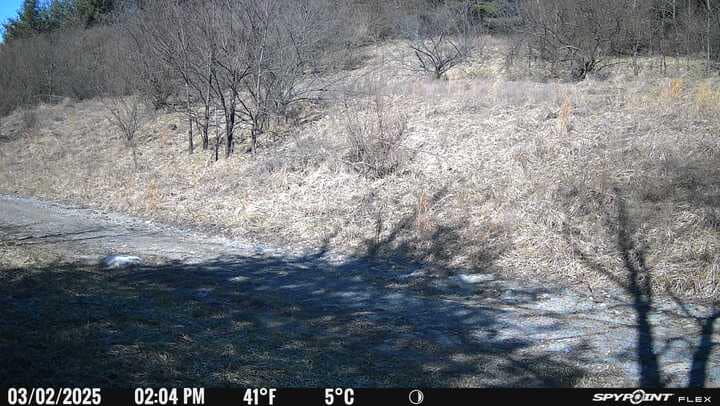 Shadows caused by the sun can trigger blank trail camera photos.
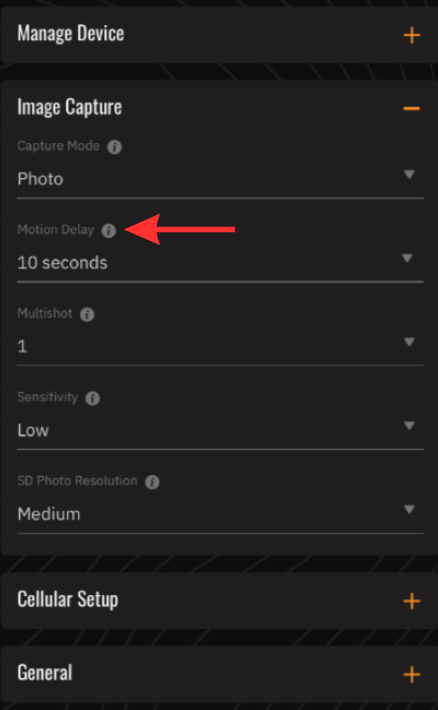
5. Adjust the Image Capture Delay
If you’ve taken care to follow all of the above recommendations and you’re still getting false triggers, you can always change the camera’s image capture delay. This is the minimum time that the camera waits between each detection. Your options range from instant delay all the way up to 15 minutes.
It can be helpful to extend the delay time if you know that your camera is placed in an area where your target animals are at, but it’s also an area where there are lots of other animals that you aren’t interested in.
Unfortunately, there’s no way to eliminate all false triggers for trail camera photos and videos. That’s just part of life with trail cameras. However, if you follow the tips outlined above, you’ll be much happier when you open up the app and take a look at what new images and videos your cameras have captured. Sure, you’ll still get some false triggers, but there won’t be as many.